
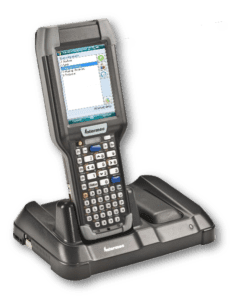
While working full-time for two of my clients I needed to procure, test, setup and deploy handheld units for use with Epicor 9.05 and later Epicor 10. After working with our Intermec partner with demo's and working with end users in both cases we settled on the Intermec CK3. There are multiple configurations of the CK3 available but almost any of them would work for us.
In order to maximize user acceptance and ease of use, we experimented with various configuration options and finally settled on a combination that works well. Since others would need to do the configuration, I documented it and recommended that they employ more advanced techniques, such as using a MicroSD card on the device and boot from that. It's always good to have the manual setup process on hand in case of an emergency.
This process and configuration worked well at the time, on those devices running Windows Mobile 6.1 and Windows Mobile 6.5. I am pretty sure previous versions of Windows Mobile would not allow the RDP session settings to be defaulted.
The following process configures each Intermec CK3 to:
1. Connect to our Wi-Fi Network.
2. Auto Start Remote Desktop Mobile with Defaults set.
3. Optimize the imager only for the Symbolizes that are used.
1. Disable ITE Auto Start
1. Disable ITE Auto Start
1. On boot up, some CK3's auto start ITE, select the 'Exit' button in the lower left corner.
2. When prompted for a password enter 'cr52401' and select 'ok'
3. When prompted to Exit ITE, select 'Yes' 4. From the Start menu select 'Settings'
5. From the Settings Menu select 'Intermec Settings' under the System tab.
6. Browse to the 'Applications/ITE' node and expand it.
7. Find the NO Auto-Start Option and enable it.
8. Select the "Save" Icon.
2. Configure Data Collection Options
2. Configure Data Collection Options
1. In Intermec Settings browse to "Data Collection/Internal Scanner/Symbologies" and expand it.
2. Verify that only Code 39, EAN/UPC & Code 128/GS1-128 are enabled under each respective node.
3. Under Code 39/Options/Full ASCII Conversion, select "Enable".
4. Under Data Collection/Internal Scanner/Symbology Options, set Postamble to '\x09' (this will send a <TAB> after scanning a barcode.
5. Select the "Save" Icon.
3. Disable RFID (unless you use it)
3. Disable RFID (unless you use it)
1. In Intermec Settings browse to "RFID" and disable "Enable RFID Service" (this will ensure that no RFID receivers are running and prevent battery drain)
2. After disabling you will be prompt to refresh, select "Yes".
3. Select the "Save" Icon.
4. Configure Communications (Wi-Fi & Bluetooth)
4. Configure Communications (Wi-Fi & Bluetooth)
1. In Intermec Settings browse to "Communications/802.11 Radio"
2. Change Security Choice to "Microsoft Security" (Funk does not seem to permit AP roaming properly)
3. This change will force a save and a warm boot, allow the device to reboot on its own and then return to this step. Note that on the reboot the ITE should NOT auto launch, if it does, start over.
4. Reopen Intermec Settings (See Step 1.4) and browse to "Communications/802.11 Radio/Microsoft Security".
5. Change Network name (SSID) to (case sensitive).
6. Change Date Encryption to "WEP".
7. Change "Network Key Setting" to "Enter Key and Index".
8. Change "Network Key Value" to your HEX key value with a preceding "0x".
9. Confirm that "Hidden Network" is Enabled.
10. Browse to "Communications/802.11 Radio/Radio Bands" and set to "b/g (2.5Ghz)".
11. Browse to "Communications/Bluetooth" and confirm that Power = Off.
12. Select the "Save" Icon.
5. Configure Device Settings
5. Configure Device Settings
1. In Intermec Settings, browse to "Device Settings/Beeper" and set Volume to "High".
2. Select "Device Settings/Display/Backlight/Battery Power".
3. Set "Backlight turns off after" to "5 Min".
4. Set "Backlight level" to "Level 1".
5. Select "Device Settings/Power Management/Battery Power/".
6. Set "Device turns off after" to "Disabled".
7. Set "Screen turns off after" to "Disabled".
8. Select the "Save" Icon.
9. Exit Intermec Settings and the Settings Screen.
6. Set Device Volume
6. Set Device Volume
1. Select the Speaker icon in the Start bar along the top of the screen.
2. Confirm that Volume is set to "On".
3. Confirm that the Volume Slider is all the way up.
7. Set Device Volume
7. Set Device Volume
In case the Device Label falls off the device needs to be identified in its settings
1. Select "Tap here to set owner information: from the "Desktop".
2. Set "Name" To the Device Label ID.
3. Set "Company" to your company\site\facility name.
4. Select "OK," Now the Owner should match the Device Label ID.
8. Configure Remote Desktop Mobile Defaults
8. Configure Remote Desktop Mobile Defaults
1. Select "Programs" from the Start Menu.
2. Select "Remote Desktop Mobile".
3. Set "Computer" to the IP address (seems to work best) or hostname.
4. Set "Username" to the Windows Network Username.
5. Set "Password" to the account's password.
6. Set "Domain" to your domain.
7. Enable "Save Password".
8. Select "Options".
9. Set "Colors" to "High Color" (16 bit).
10. Enable "Full Screen" and "Fit remote desktop to screen.''
11. Select "Resources".
12. Set "Remote desktop sound" to "Play on this device" (very important, otherwise Epicor errors will not sound and confuse users).
13. Select 'OK' in the upper right corner.
14. Select "Connect" to test Wi-Fi and Remove Desktop Settings. (Please note that a Windows Profile for the Device ID User must first be setup).
15. Log Out of the RDP Session.
16. Once a successful connection is made the settings will save and you can exit Remote Desktop Mobile.
9. Setup Remote Desktop Mobile to AutoStart
9. Setup Remote Desktop Mobile to AutoStart
1. Select "Programs" from the Start Menu
2. Select "File Explorer".
3. Change Browser Bar from "My Documents" to "My Device".
4. Browse to "Windows/Start Menu/Programs/".
5. Find "Remote Desktop Mobile" and copy it (touch-hold for context menu and select "Copy")
6. Select "Up" from the bottom bar until you get back to the "Windows" directory.
7. Open the "Startup" directory and Paste the Shortcut. (touch-hold for context menu & select 'Paste Shortcut')
8. "Remote Desktop Mobile" icon should paste and appear.
9. Close out of all windows.
10. Restart
10. Restart
All settings have been made now for one final test to make sure that everything will work as expected.
1. Gently press and hold the yellow power button on the keypad, release the key once the screen shuts off.
2. After power up Remote Desktop Mobile should auto start.
3. Select "Connect" to test the Wi-Fi and RDP settings.
4. If you successfully connect to the RDP session you are finished. If not, go through these instructions and verify all settings.