
Here is the content of the Epicor Search Tools session, including the PowerPoint in PDF format presented during the session. Please like, share and leave a comment if you downloaded the PowerPoint, or found this topic helpful or how you plan to use the Epicor Search Tools to seed other's imagination.
If you ever find yourself in need of Epicor consulting services, take a moment to explore how I can be of assistance. Feel free to reach out—I would love to help! I would like to thank Kathie Poindexter at Epicor for planning and scheduling the sessions.
This session reviewed the many different types of Search Tools included in Epicor and highlighted how I have helped some of my clients use these tools to quickly get to the data. Often times users asked for reports or dashboards—but after a process review, many times all that was needed was some education on how to use the Search Tools or a custom search. We will be going through all the Epicor Search Tools, beginning with the most commonly used ones and then some of the little-known tools.
Where To Find Search
Where To Find Search
- Toolbar's Binocular’s button.
- Search buttons next to a key field. These buttons are found on sheets throughout the interface. The button label indicates what specific records this search program locates.
- If you have Enterprise Search, it is available on the Epicor Main Menu.
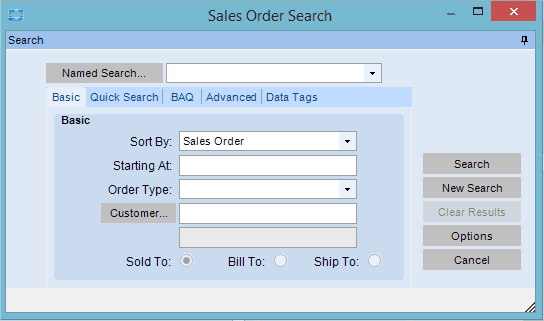
- Sort By: Select an option on this drop-down list to organize the search results by a specific field found in the record. The results display in descending order.
- Starting At: Enter a character or characters to indicate where in the dataset you would like to begin your search.
- Additional Filters: Many Basic searches offer addition types of filters to further specify the criteria
- Combobox/Dropdown: Select from a predefined list of values.
- Search: Click on the Search button to search for an additional filter.
- Radio Button: Select a radio button that best matches what you are looking for.
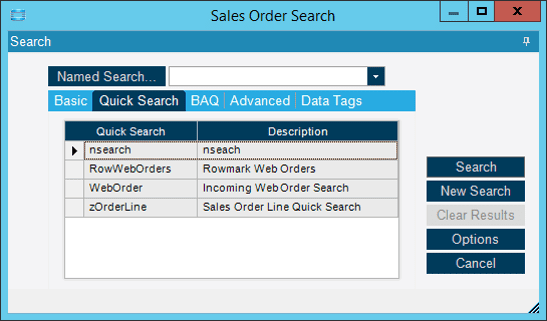
Sometimes the Basic Search does not provide enough criteria options. A Quick Search is a custom designed search based on a BAQ (query), that can be developed to provide custom searches that fit a specific workflow or business process.
Quick Searches are great for adding additional result columns when the base search does not provide the columns your business process needs. You can just emulate the Basic Search criteria. Select the Quick Search from the list and click on "Search", then enter the Quick Search criteria. Click "Search" again to view the results. See your ERP Administrator if you have an idea for a Quick Search.
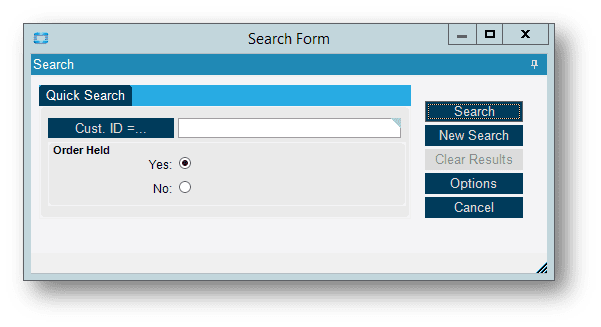
- Search by User Defined fields.
- Search for Sales Orders that contain a certain part or open lines, for this Epicor has already provided a Quick Search as an example called zOrderLine.
- For times when the Base search only provides a single value criteria option, like in Master Pack Entry and Transfer Order Shipment entry.
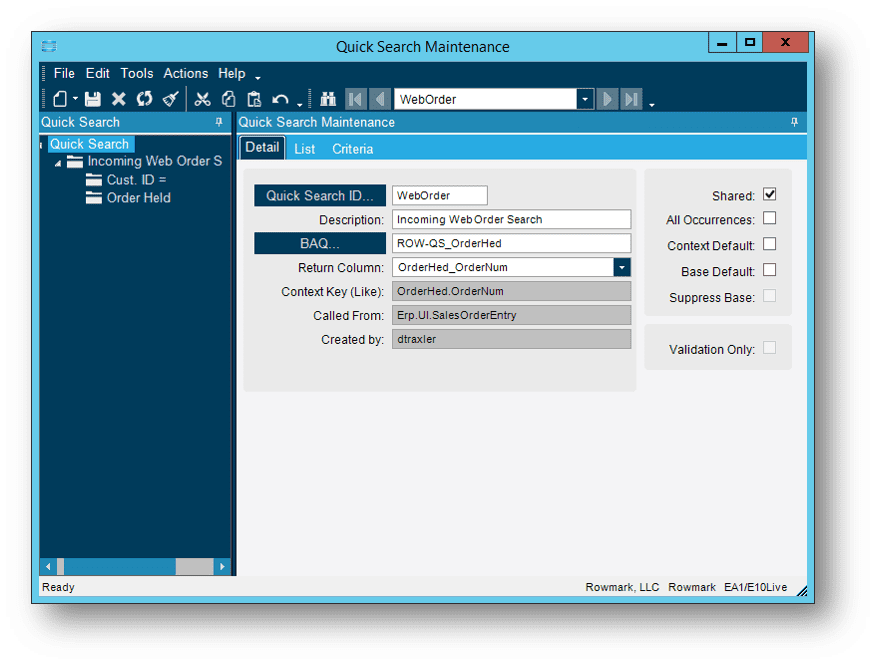
Create a BAQ for your Quick Search
- Make sure you mark the BAQ Shared.
- Be sure to include the Key context fields such as OrderNum and PartNum.
- If the BAQcan be limited, set appropriate criteria.
- For the display fields, be sure to select all the fields you want displayed in the search results.
Create the Quick Search
1. Open the program you would want to use the Quick Search in, like Order Entry
2. Right-click on the search field (Order Number)
3. Select Quick Search Entry
4. Click New
5. Enter BAQ ID and select the matching return field (OrderNum)
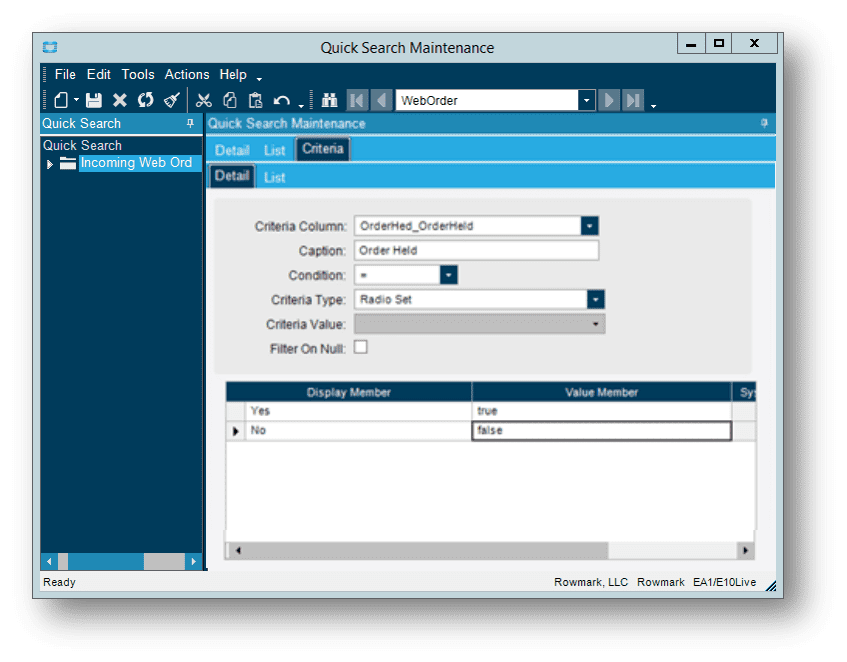
6. Setup Quick Search Criteria
1. New > Quick Search Criteria
2. Select Criteria Column, Caption, Type of Condition (=, <>, >, <, >=, <=, Begins, Matches) and Type of Criteria (Prompt, Constant, Value List, Radio Set).
3. For Value List or Radio Set, you can create the Option names and values in the grid below. This is handy if you want a drop down, but Prompt doesn’t automatically create a drop down.
For instance, on a Part or Job Quick Search you might want the Type field to be a drop down for P & M (Purchased & Manufactured). While it doesn’t do that by default, with this you can create it. This could also be used for a Boolean value field where you want options that are more descriptive…. or you can use a value list to limit the options the user can search against (Part Class, Product Group, etc.).
7. Test Your Quick Search
1. Actions > Test Quick Search
2. SAVE -> Share -> SAVE -> All Occurrences
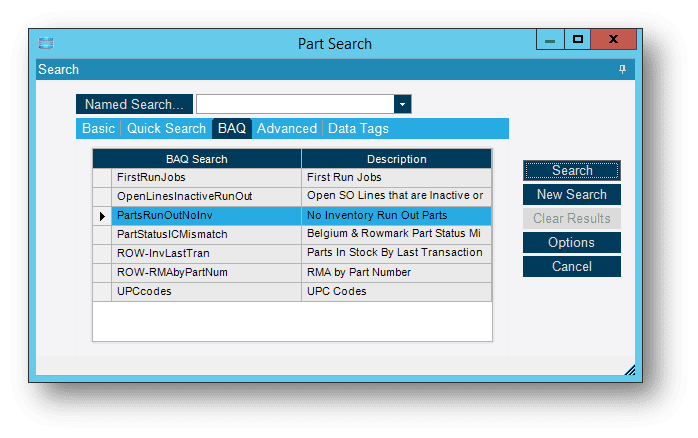
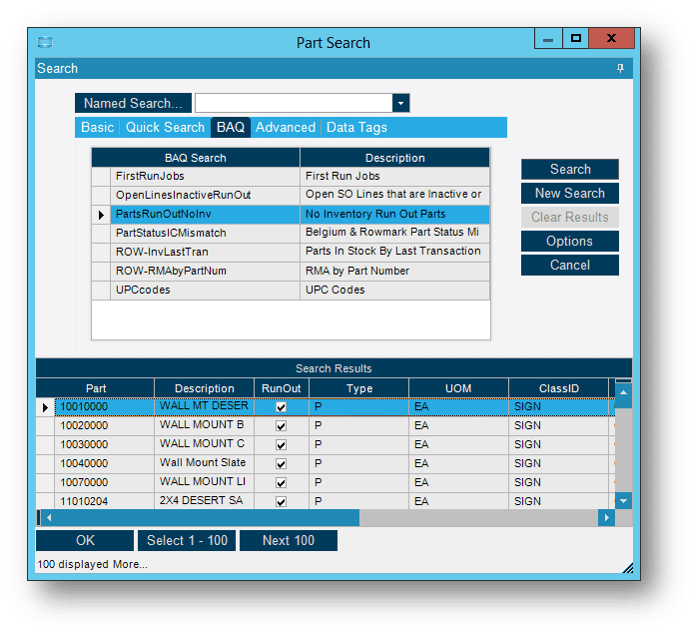
BAQ Search: The Steps
BAQ Search: The Steps
- Create a BAQ for your BAQ Search
- Make sure you mark the BAQ "shared"
- Be sure to include the Key context fields such as OrderNum, PartNum, etc.
- Usually the BAQ can be limited, set appropriate criteria.
- For the display fields, be sure to select all the fields you want displayed in the search results.
- Set which Search Screens it will display
- Select the BAQ Search tab.
- Select the Like columns that represent the Search Screens you want.
- Save.
- Test
- Open the appropriate screen.
- Click on the appropriate Search button.
- Select the BAQ tab – your BAQ Search should be listed.
- Highlight the BAQ Search Row and select the Search button.
- The BAQ results will display.
- Depending on the Search, you can either select the result row you want or use the Select multiple buttons to select more than one results row to pull into the program.
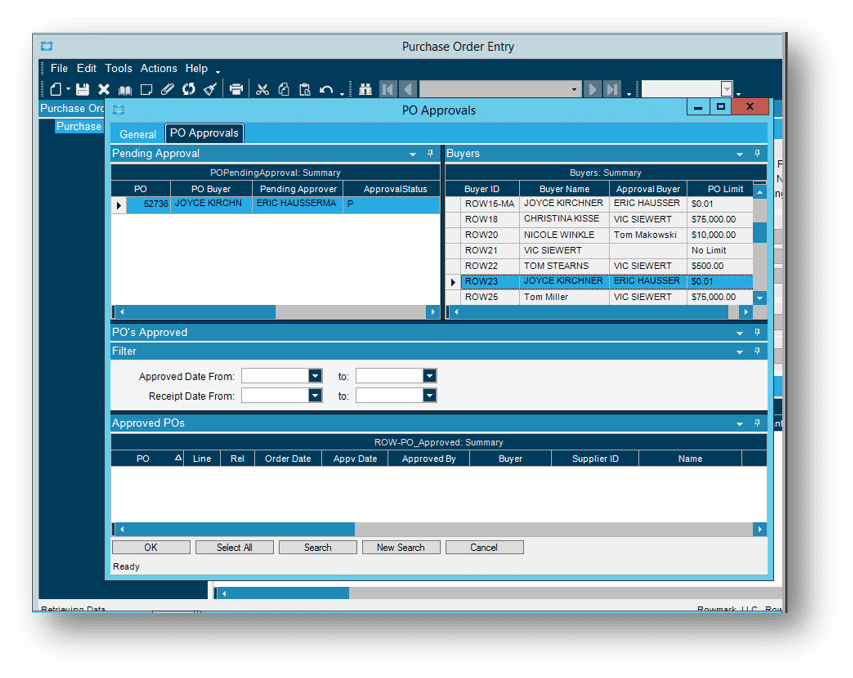
Advanced Search: The Steps
Advanced Search: The Steps
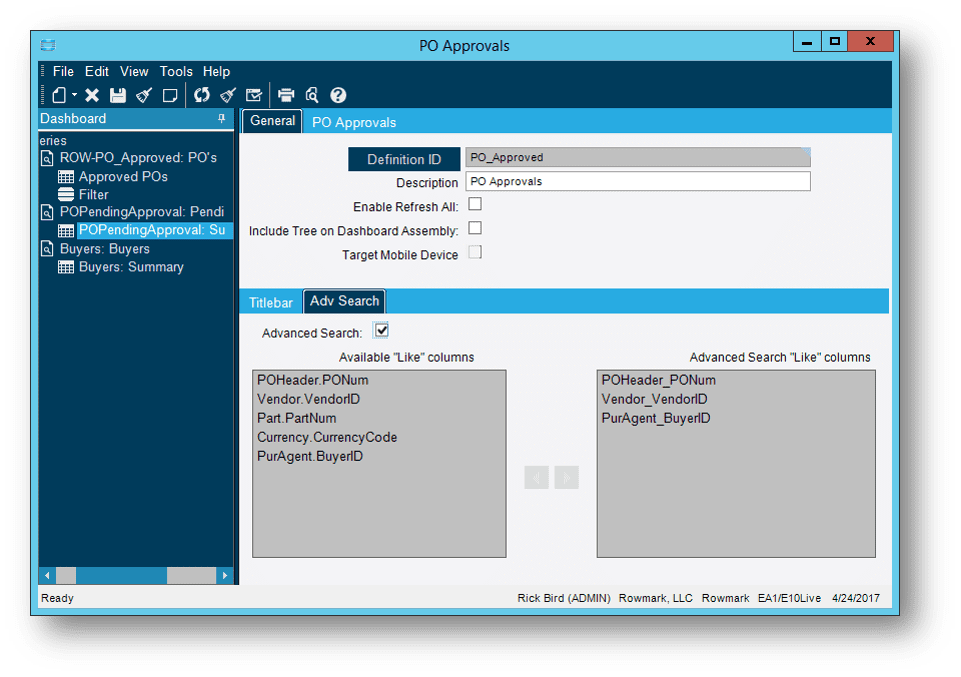
1. Create a BAQ for your Dashboard
- Make sure you mark the BAQ "shared"
- Be sure to include the Key context fields such as OrderNum, PartNum, etc
- Usually the BAQ can be limited, set appropriate criteria.
- For the display fields, be sure to select all the fields you want displayed in the search results.
2. Create your Dashboard
- You will probably want to create a Tracker pane for criteria filters.
3.Test and Save the Dashboard before enabling Advanced Search
Select the General tab and then the Adv Search tab.
- Enable the dashboard for Advanced Search
- Select the appropriate Like columns that correspond to the Searches you want the dashboard to be available.
4.Test

Named Search: Use Cases
Named Search: Use Cases
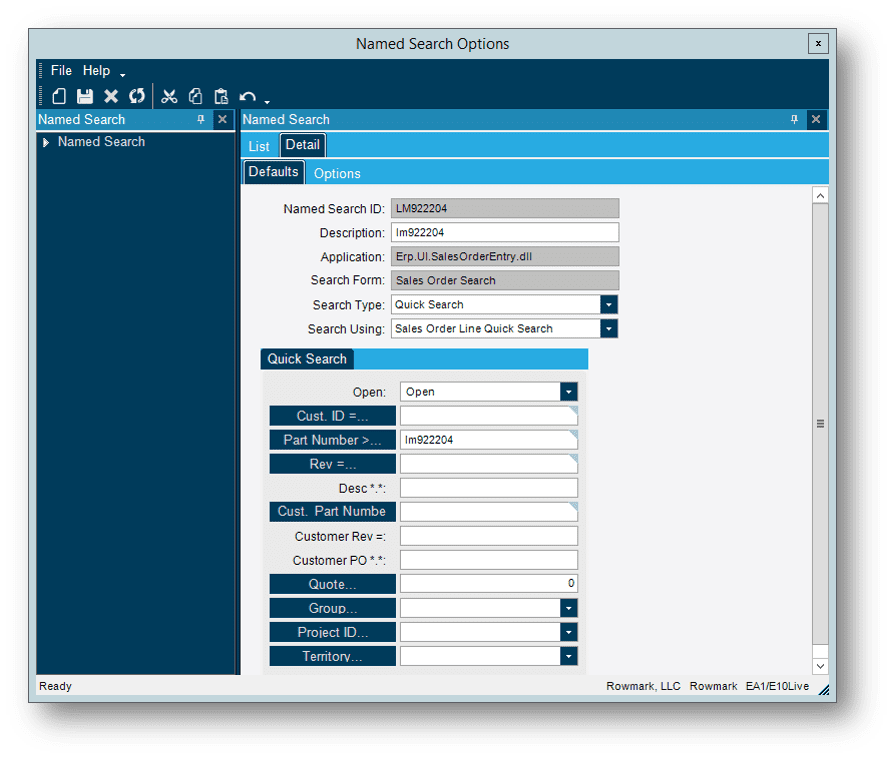
Open the program and click on the search button.
1. Click on the Named Search button.
Named Search Options will open.
1. Click on the New icon in the toolbar.
Give the Named Search an ID (no spaces).
Give the Named Search a Description.
Select the Search Type you want to use: Basic, Quick Search, BAQ Search.
- If Quick or BAQ Search, select the Using search option.
- For Basic and Quick, the search form will display. BAQ Searches do not have any criteria options, so nothing displays.
- Set the default search options for this named search, just like normal.
Select the Options tab to control the Named Search behavior.
- Default
- Auto Execute
- Upin Criteria Sheet
- Return All Rows
- Maximum Rows Returned
- Single Value Auto Select
Data Tag Search
Data Tag Search
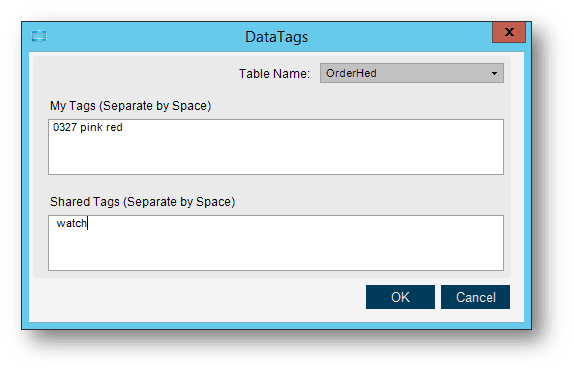
- Create The Data Tag
- Identify a record to be tagged.
- Right Click on the key value
- Select "Tag Record"
- Enter private or shared tag and select OK.
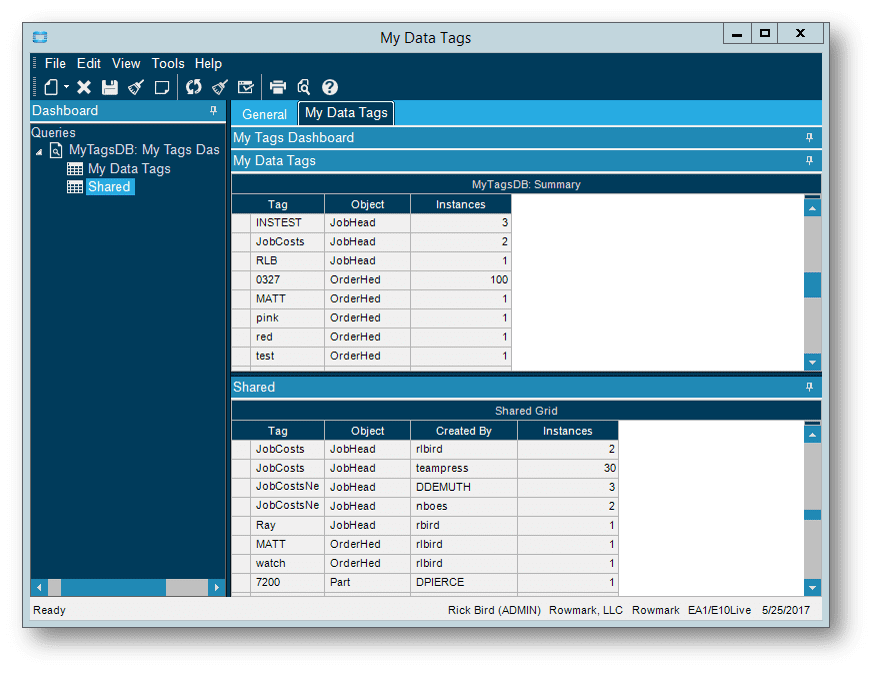
The one trouble with the data tag's is that users forget what tags they used so they don’t have something to search for. You can address this by creating a My & Shared Tags Dashboard.
- Create a BAQ on the ICE.SysTag table where the CreatedBy = CurrentUserID OR IsShared = 1.
- Created a Calculated Count field and then group by all fields besides the Calculated Count field.
- SHARE!
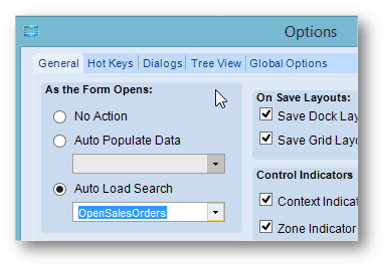
Now to get into potentially dangerous stuff. Each program in Epicor can be configured to either automatically populate the program with data or automatically load a Named Search. These options can be accessed by selecting Options from the Tools menu within each Epicor Program. The option settings are per user and are considered a personalization. On the General tab there is a As the Form Opens section, here you can select what you want to happen when you open the program.
- No Action is the default and nothing will happen when you open the program
- Auto Populate Data will automatically execute and select the data specified by the criteria of the Named Search specified. If you do not select a Named Search then ALL the records for the program in the database will be loaded into the program. This is generally a bad idea.
- Auto Load Search will automatically open the Search window with the selected Named Search. If a named search is not select then the Base Search form will be loaded when the program is opened.
Auto Populate: Use Cases
Auto Populate: Use Cases
Auto Load Search: Use Cases
Auto Load Search: Use Cases
Auto Populate & Auto Load Search: The Steps
Auto Populate & Auto Load Search: The Steps
Open the Program
Select Options from the Tools menu.
Auto Populate & Auto Load Search: A Final Warning
Auto Populate & Auto Load Search: A Final Warning
- Auto Populate Data: When left blank, it will then retrieve all data records for the program. Use with caution!
- Auto Load Search: When left blank, it will auto load the default search for the program.
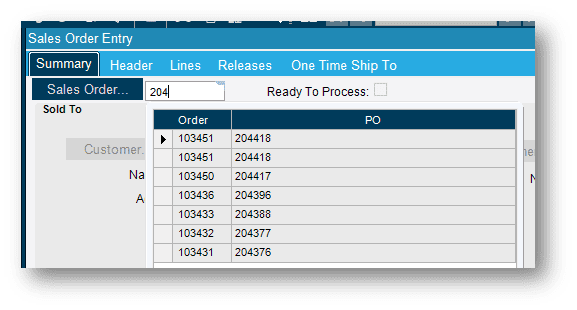
Predictive Search: Use Cases
Predictive Search: Use Cases
- Make sure you mark the BAQ "shared".
- Be sure to include the Key context fields such as OrderNum, PartNum, etc.
- Usually the BAQ can be limited, set appropriate criteria.
- For the display fields, be sure to select all the fields you want displayed in the search results.
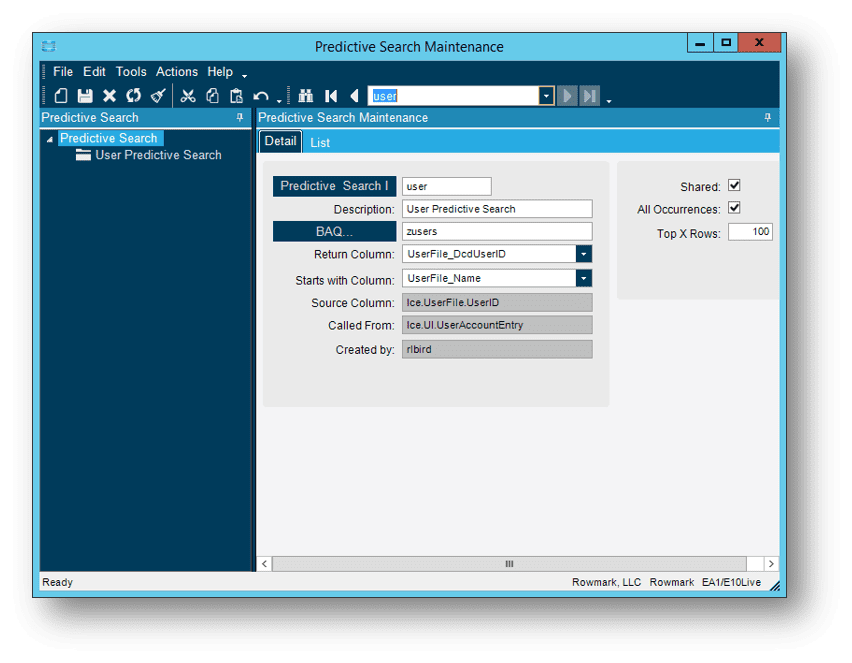
Open the program you wish to create the predictive search in and right click on the search filed and select Predictive Search Entry.
If this option is not available in the context menu, then check your user account in Epicor under the options tab and make sure the account is enabled for maintaining Predictive Search.
Select New and set a Predictive Search ID, Description and select the BAQ created earlier.
Select the Return Column that matches the search field.
Set the Top X Rows (default of 100 seems excessive, try 25).
Save > Shared > Save > All Occurrences
Test!
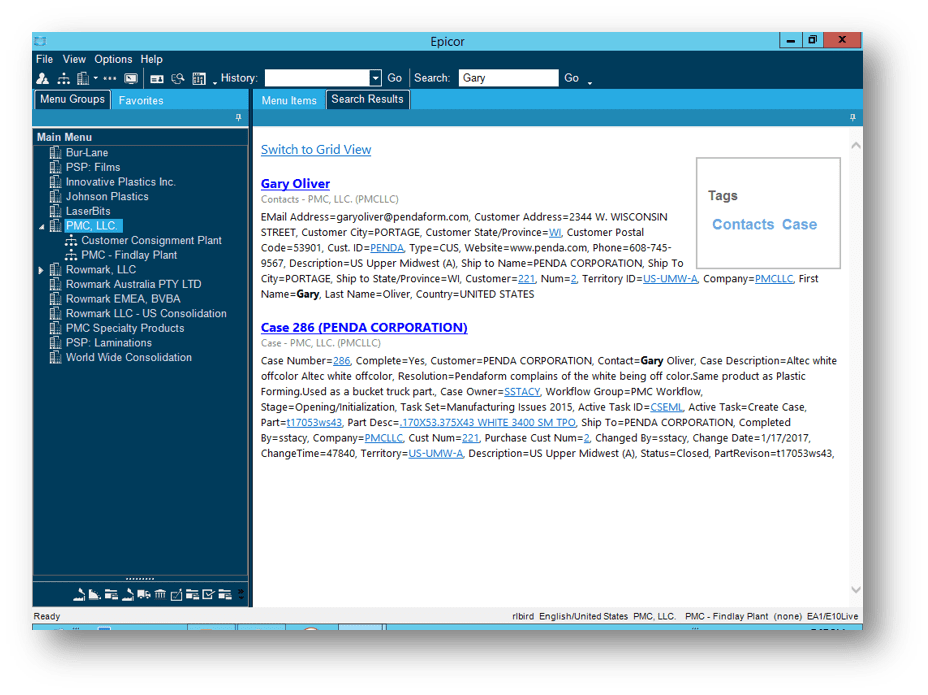
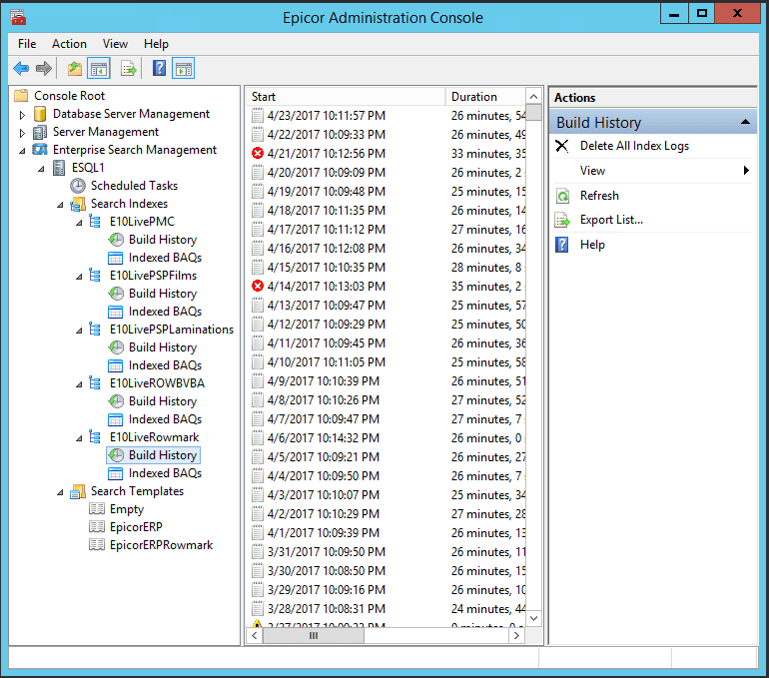
- Most common problem was timeouts.
- Create a Search Index for each Company.
- Only Index the BAQs that each Company needs.
- Do not rebuild more than necessary.
- If needed, limit the BAQ results additional date criteria.
- Monitor Build History – As your data changes the rebuild may take longer or corrupt data can cause the rebuild to fail.
Wrap Up: The Search Summary
Wrap Up: The Search Summary
While the time savings is hard to definitively measure, those who do leverage these different search functions are able to save clicks and seconds throughout their daily processes that they repeat dozens of times a day. Especially for those working with Customers on the phone, every second counts and being able to quickly get data or answer customer questions improves the customer experience and satisfaction.
Attached below is the original Insights 2017 Slide Deck to assist with exploring these search tools and deploying them in your environment. Please let me know if I can be of any service regarding design, creation, setup or anything else with Epicor Searches. A full business process review is an ideal way to identify where these powerful search tools can be deployed to save time.
